Announcement

Collapse
No announcement yet.

Project Beautiful Beast work log

Collapse
X
 
  • Filter
  • Time
  • Show
Clear All
new posts

  • #61
    Alright, the project continues. Done a small amount of work since the last update, but I'll be taking a week and a half off work for Christmas break and will be spending a good amount of that time trying to get this thing closer to driveable.

    Worked on relocating the battery this weekend. The race (motorcycle) battery doesn't fit in the stock battery mount, so I decided to put it out of the way. Wanting to clean things up in the engine bay and route the wiring down the drivers side fender, the obvious choice to mount the battery was directly below the stock mounting area. To make room I removed the pop-up headlight, motor, and coolant overflow tank. All together it was roughly 12lbs of weight savings. Then I went to work fabricating a mount.

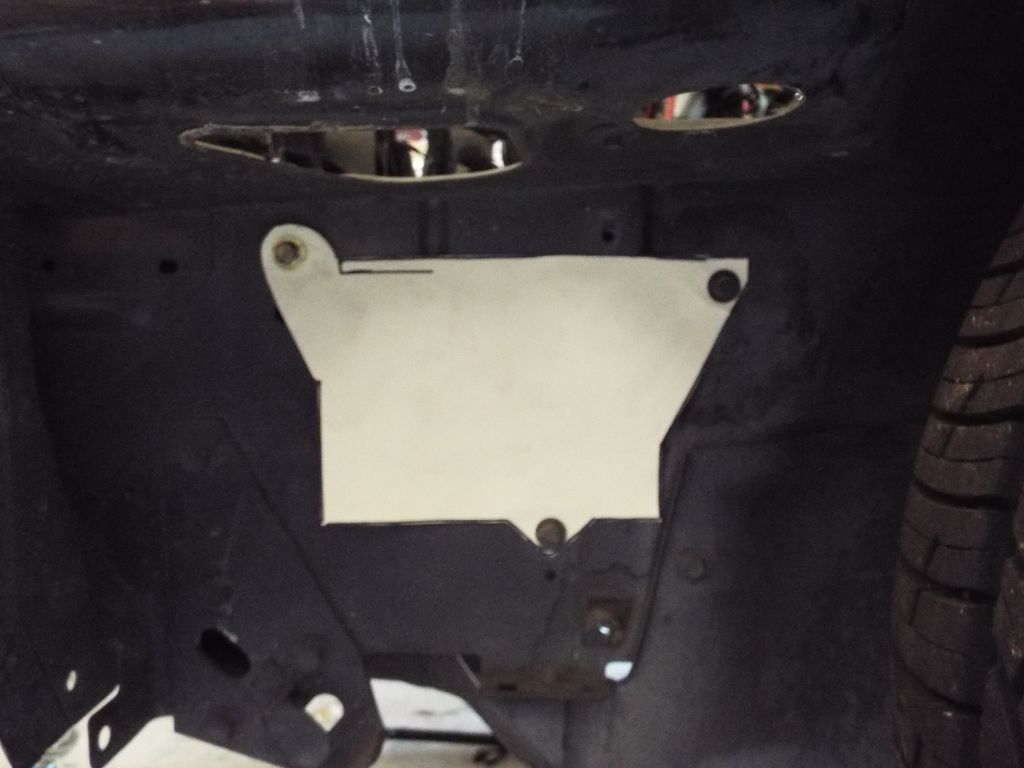
    Started with a template that would utilize stock bolt holes


    Transferred to metal sheet


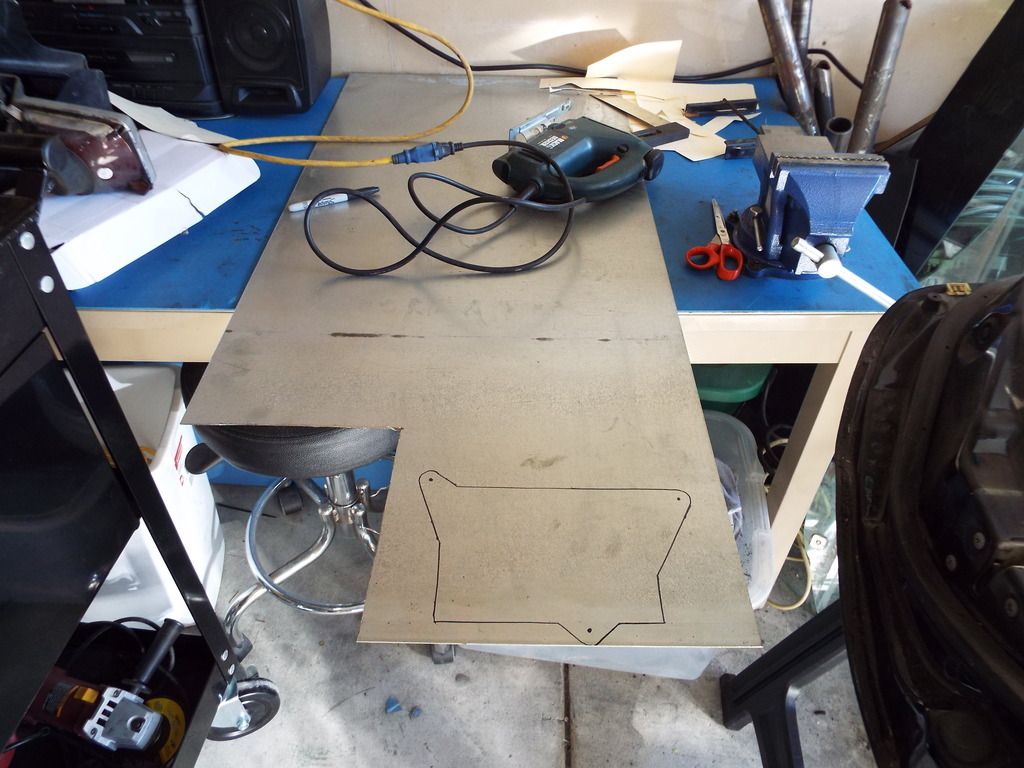
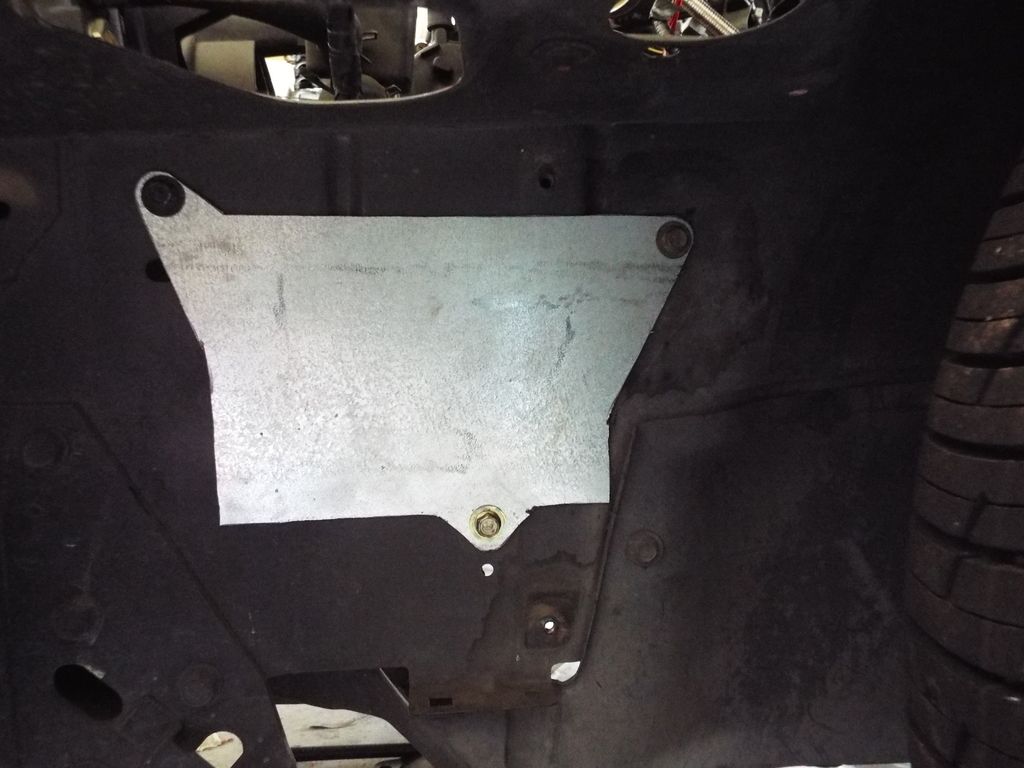
    Cut out, and checked fit... looking good


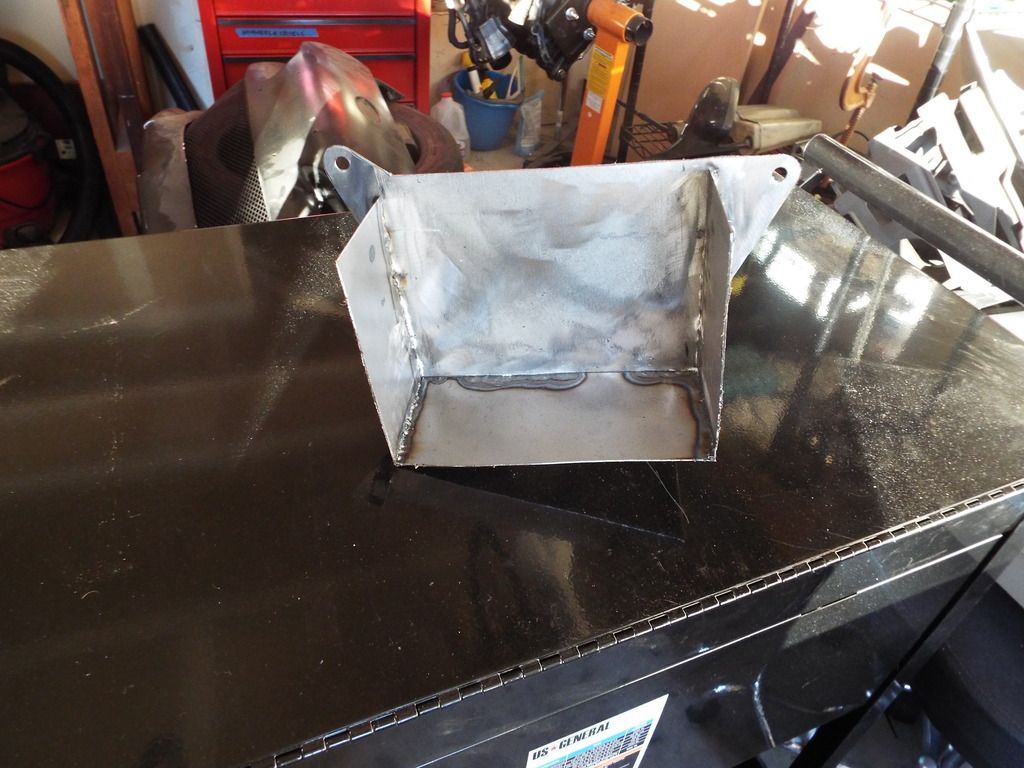
    Cut out some more sheet and bend it into the box that will hold the battery


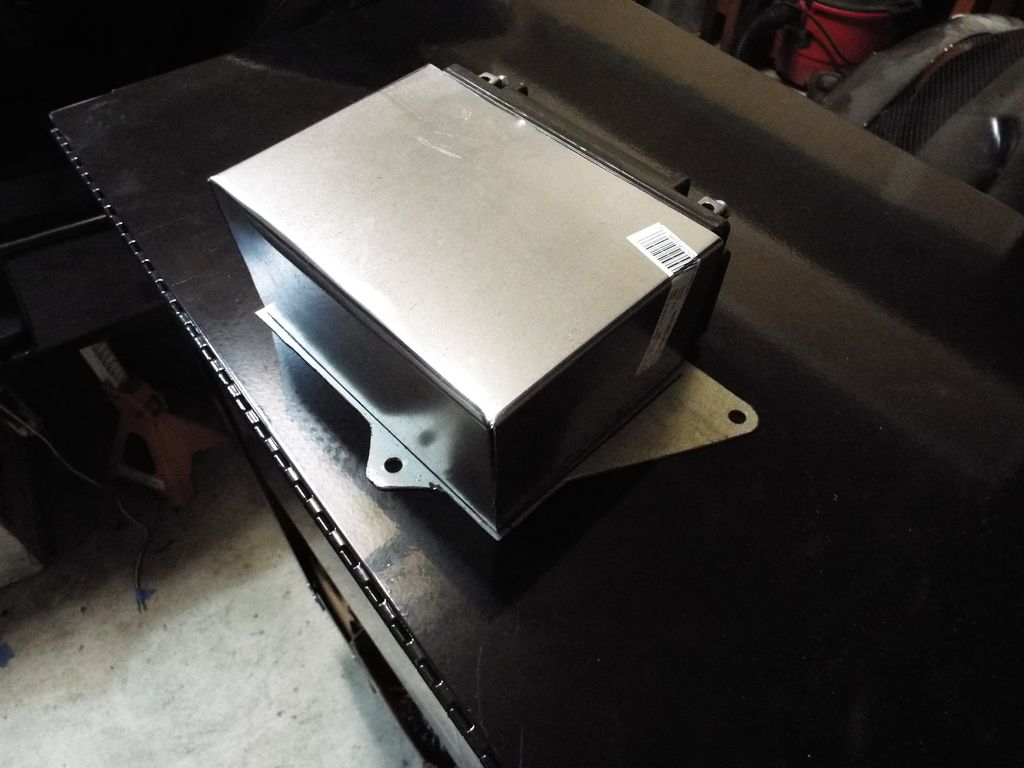
    After trying to tack the box in place I realized it wasn't going to work, due mainly to the bend diameters being a bit wider than I had hoped. Ended up cutting the front facing wall off.


    Test fit looks good...


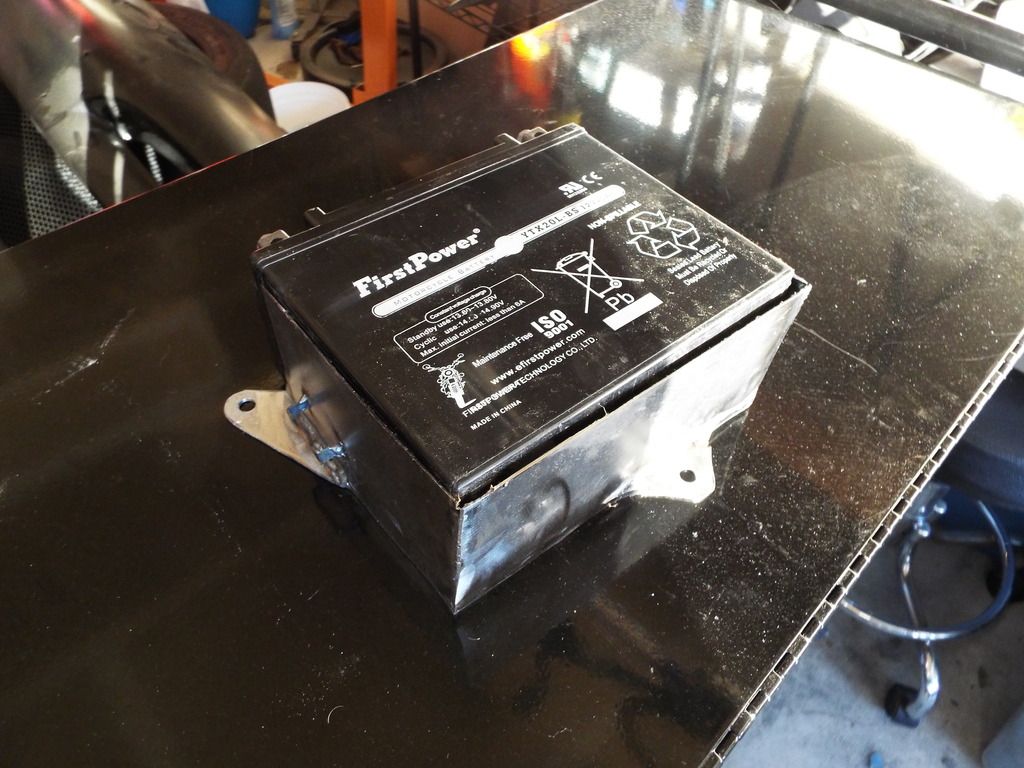
    But how to hold it in place? Thought about it for a minute and remembered I had the PERFECT solution.


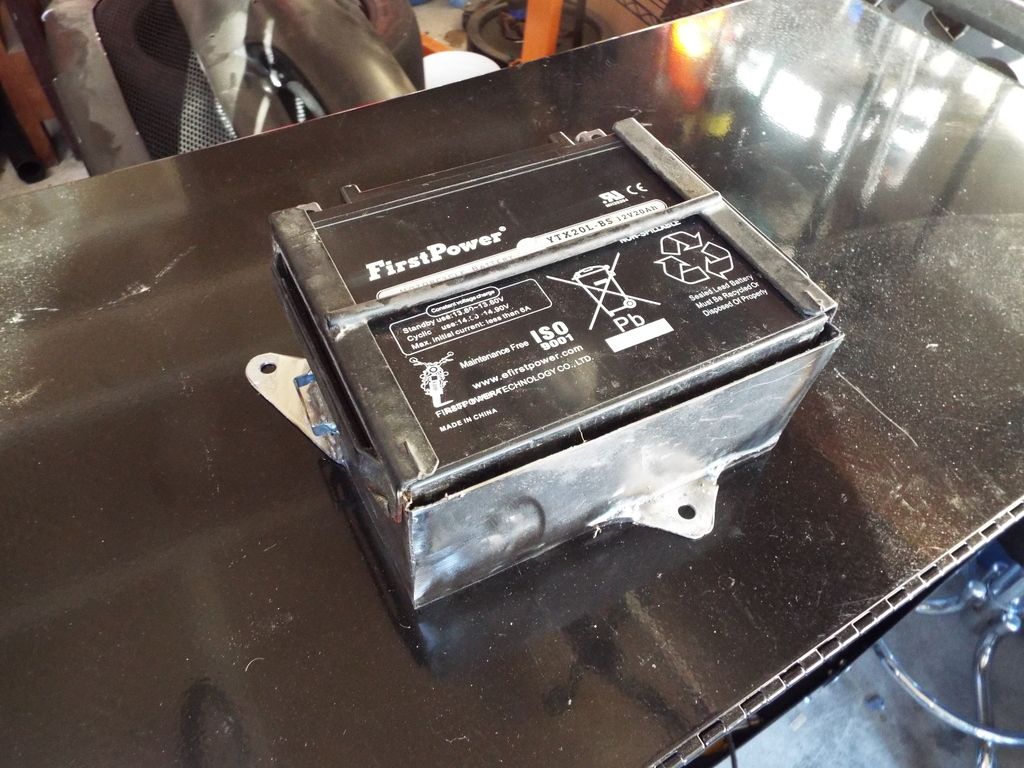
    I realized somewhat by accident a while ago that my an old aftermarket battery hold down I had fit the "race" battery perfectly. And also turned out to be a great way to hold the battery into the box.

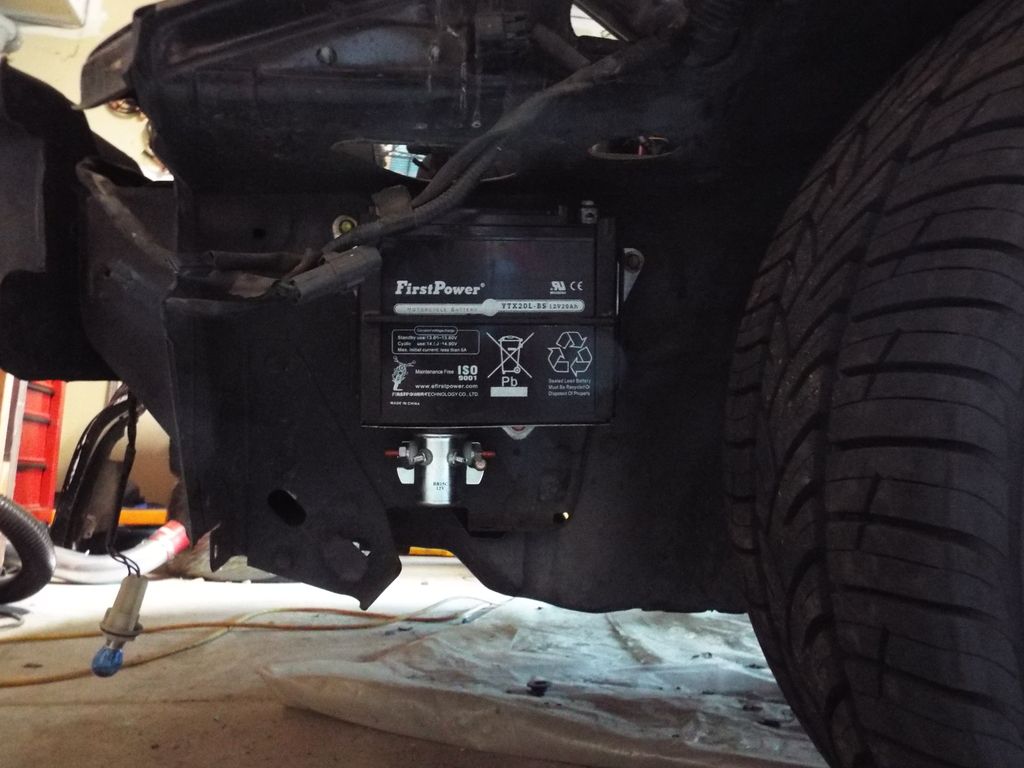
    Installed on the car


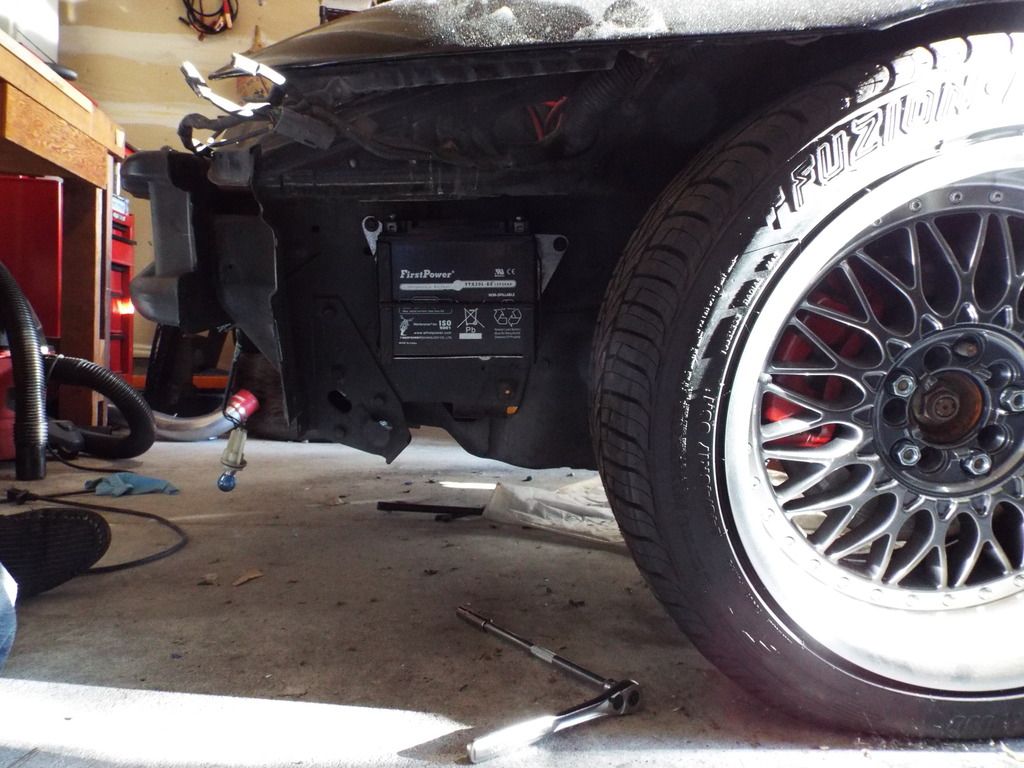
    And with the remote cut-off switch


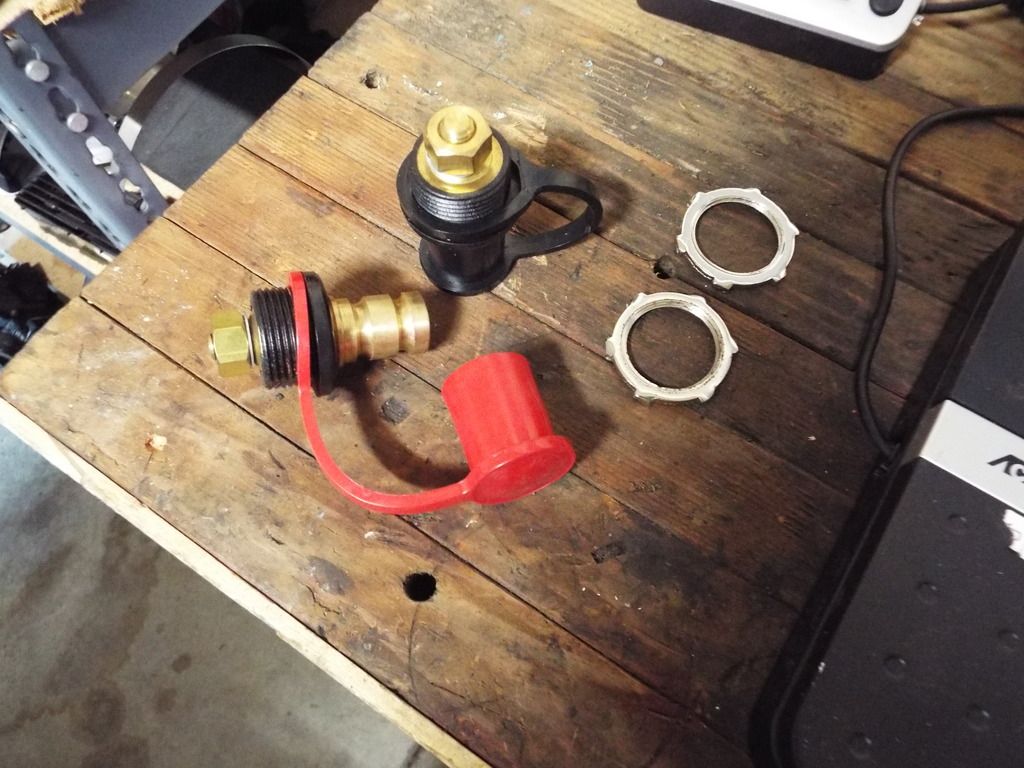
    As a car that I may not drive super often, I want a way to keep the battery from draining when the car sits, and also be SURE that everything is OFF. In case something does happen drainage wise, I also installed some remote terminals that can be easily accessed from the engine bay.
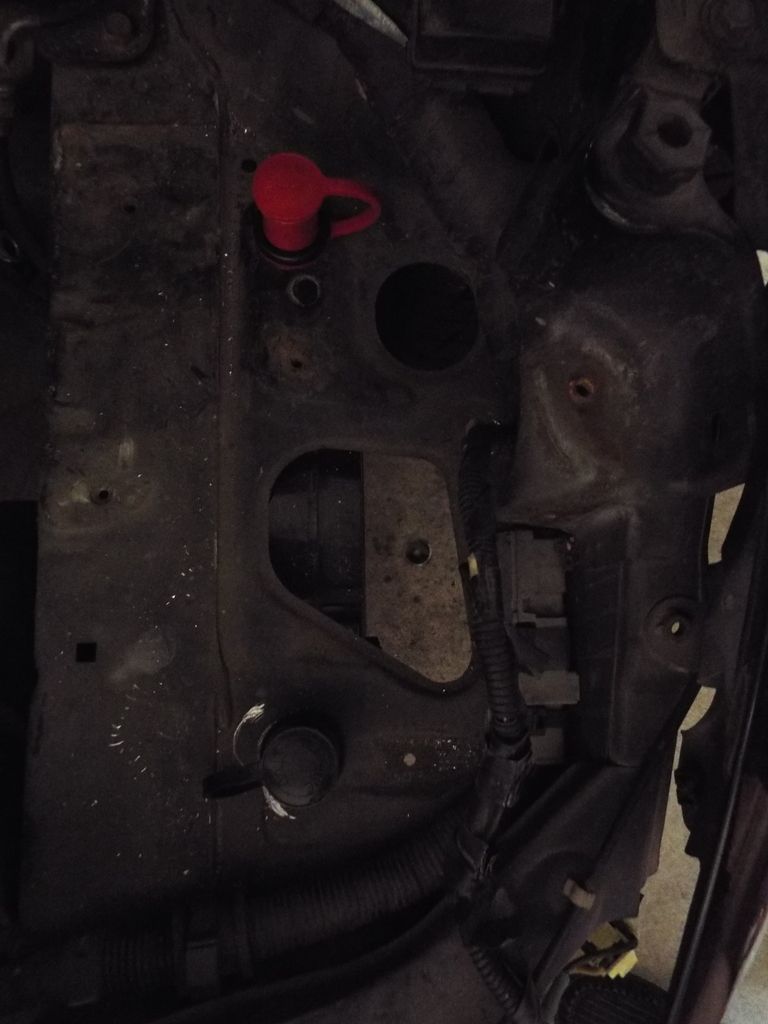

    Installed


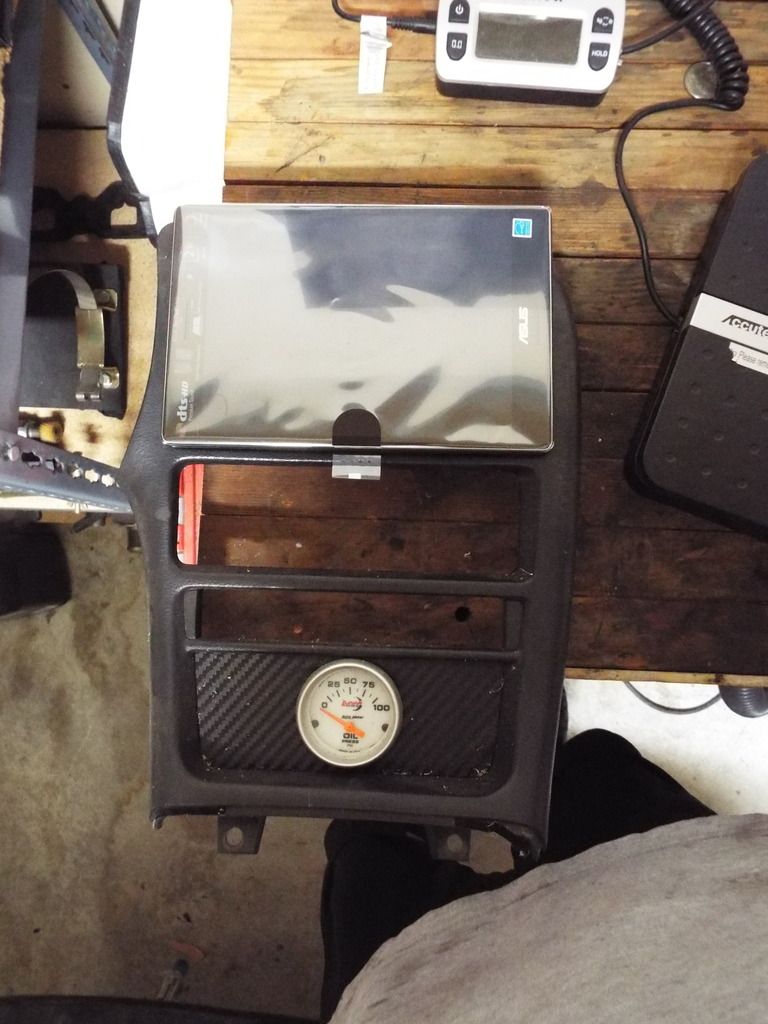
    And lastly, my Asus ZenPad came in the mail today as well. Bought it with intentions to fit it into the center console, and after a quick glance at sizing it will fit perfectly!


    More to come starting Wednesday...
    Beautiful Beast- 1997 PGT in process of becoming an SC/NA Beast...
    Elo- 1990 BMW 325i weekend car
    Brunhilde- 2003 BMW Z4 3.0 6-speed daily driver
    The Beast- Sleeping in the junkyard...

    Comment


    • #62
      Nice work with the battery mount!
      1992 Probe LX_Rust in Peace
      1989 Probe GT_Weekend Warrior
      2002 Focus SVT_Powerworks Supercharged_Gone
      2014 Fiesta ST_Lemon
      2017 BRZ Premium_Daily

      Comment


      • #63
        Continuing our story. I've been off work since Wednesday and don't start again until the 3rd, so work has been taking place. Unfortunately some has had to do with replacing the alternator on my E30 which as been a MAJOR pain in the ass due to bullshit... but I've still made some good progress. Unfortunately it's not always things worth capturing on camera, but it's getting me closer to the goal!

        Notably:
        -Finished wiring up the relocated battery and cutoff switch
        -Finished up the enlarged downpipe by:
        -Moving the bung for my wideband o2 after the banks merge
        -Plugging the stock o2 sensor holes
        -Cutting off and installing a new v-band after the flex pipe
        -repainting with silver high temp paint
        -Reinstalled the downpipe and put the cross members back in place (YAY!)
        -Removed the passenger side headlight assembly and motor
        -Small odds and ends such as cutting down the brackets that hold the window in place

        Again, none of this is glorious, but all tedious and large hurdles to the car being driveable!

        Other notables with pictures...

        Mounted the front bumper and did some trimming in preparation of the custom headlight install to come. Hoping it'll look nice... Here's a hint
        Before:


        After:


        As you may remember, I had previously cut a huge hole in the floor of the car, which obviously needed to be filled. Set about doing that today and made a pretty good dent. Certainly not finished, but its not a huge hole anymore! I looked around photobucket for a minute and couldn't find a picture of the hole in all its glory, so you'll have to settle for the progress pics instead.


        Might I add that welding this is a BITCH. It burns through so easily and the welds look like complete ass!

        I also had aspirations to finish up the weight reduced passenger door and masked it off for paint and tried to cover the panel in cf "vinyl", but ended up ripping it! Shit!

        And after that disaster, decided that I no longer wanted to wait to get the screen installed, so I bought myself a dremel and went to work.
        Starting point


        Cutting is done... doesn't look great


        But with the screen in place it looks much better!


        Side view


        The whole idea is that I'm going to use it viable Bluetooth to view the outputs from Megasquirt. I don't want to have to keep it in the car full time, so I just cut a slot in the center console to slip it in and out. Not the most beautiful, but certainly functional. It can be done again at a later point if I care that much.

        Test fit in the dash


        Still left on the list
        -Exhaust
        -Finish welding the hole
        -Headlights
        -Full rewire?
        Beautiful Beast- 1997 PGT in process of becoming an SC/NA Beast...
        Elo- 1990 BMW 325i weekend car
        Brunhilde- 2003 BMW Z4 3.0 6-speed daily driver
        The Beast- Sleeping in the junkyard...

        Comment


        • #64
          Tablet holder looks clean, Still planning to use the skirt exit exhaust? was that the reasoning for the floor hole?
          1992 Probe LX_Rust in Peace
          1989 Probe GT_Weekend Warrior
          2002 Focus SVT_Powerworks Supercharged_Gone
          2014 Fiesta ST_Lemon
          2017 BRZ Premium_Daily

          Comment


          • #65
            For the time being I'm going with a very short exhaust down the stock tunnel, likely ending before the gas tank. At a later date this may change to another idea I have in my head. The side exit exhaust was great from the outside but due to the placement of the muffler I would have had to build an entire enclosure for it which would have added a good amount of weight and really gone against the entire idea of this car.

            Exhaust work, for me, is never done. I have the strong suspicion there will be another system on this car in the near future, that no one has ever done before.
            Beautiful Beast- 1997 PGT in process of becoming an SC/NA Beast...
            Elo- 1990 BMW 325i weekend car
            Brunhilde- 2003 BMW Z4 3.0 6-speed daily driver
            The Beast- Sleeping in the junkyard...

            Comment


            • #66
              Ohhhhh exhaust. The never ending story. Welp, here we go with a new one. As you can see the old setup was not particularly beautiful, and given my desire to keep it short (read light weight) I was worried it would be extremely loud with just 2 resonators to muffle it. So I decided to try a little something I found when researching the NEXT possible iteration of my apparent exhaust obsession.

              Old setup consisted of a gender neutral vband, to cutout y-pipe, to hollowed cat, to pacesetter resonator.


              Cut the sexually ambiguous v-band and hollowed cat off the y-pipe


              And mounted the gender specific v-band to an extension to maintain the position of the y-pipe outlet


              I had purchased an exhaust flare tool at Harbor Freight a while back and was itching to use it. That itch turned out to be quite annoying, however, as it was a total pain in the ass to use


              But after a decent amount of trial and error, performed the required task.


              Installed on the sexually opposed v-band


              And tacked in place along with the electric cutout to make sure it was all oriented and placed correctly


              Next was the experimental piece of the install; an exhaust insert. Given the space constraints and my desire for a quiet exhaust, I figured this may fit the bill perfectly


              It came with 2 end caps, one with a half inch hole, the other with no hole that you can drill do your desired size to reduce noise.


              I opted for the most restrictive option, hoping to keep things subdued


              Slip that sucker into place


              And tacked to secure


              Welded at the end of the line


              And the Magnaflow resonator slapped on the end


              Installed


              The resonator has a gender neutral v-band on the end of it, on which I'm going to mount a turn down at a point in the future.
              Moving on to the massive hole in the floor to fit the exhaust cutout


              Not quite big enough


              Modifications were made


              to be continued...
              Last edited by proboner; December 29, 2016, 02:34 PM.
              Beautiful Beast- 1997 PGT in process of becoming an SC/NA Beast...
              Elo- 1990 BMW 325i weekend car
              Brunhilde- 2003 BMW Z4 3.0 6-speed daily driver
              The Beast- Sleeping in the junkyard...

              Comment


              • #67
                So wait, is this car a male or a female? I'm confused haha
                Looking good, glad to see some more progress

                Comment


                • #68
                  Welder is having some issues and waiting on new consumables to come in, so the hole in the passenger floor will have to wait.

                  Anyway, been mulling it over and finally decided to do it. I had MS2 on my old 93 PGT along with the CZT manifold blah blah blah... ran great and was very quick. I have not for the life of me been able to get MS working on this car. MS2 didn't work, switched to MS1 without any luck, eventually bought an MS3X with the MS3X harness from DIY Autotune hoping it would fix the problem... no. I've been steering clear of this project because I knew it would just frustrate me, but after relocating the battery and truly paying attention to what a disgusting mess the stock wiring is, I decided to REALLY dive in.

                  Before:


                  Oh whats this?


                  Engine harness and ECU are out


                  Going to redo the engine harness using a DIY Autotune MS harness and go standalone MS3X. Once I get it running like this, I'm going to go full hog and replace/redo the entire rest of the harness. Many parts were ordered today.

                  Also finished up another project. Welded shut the roughly 10 holes that held the clips which attached the weather stripping to the passenger door and smoothed it out, painted it with a rubberized coating (which I now fully regret, definitely NOT painting the interior with this paint), and covered the plastic door panel I made with cf vinyl. Got 1 crease and a couple bubbles, but for my first time applying vinyl to a very large flat surface, it went pretty decently.


                  And lastly I did a little mock-up with some new lights I bought to get an idea of how the headlight situation will work. Pretty sure these guys wont work but I've got a new set coming that may be a better choice. Here's a very rough idea of what I've got going on in my head
                  Beautiful Beast- 1997 PGT in process of becoming an SC/NA Beast...
                  Elo- 1990 BMW 325i weekend car
                  Brunhilde- 2003 BMW Z4 3.0 6-speed daily driver
                  The Beast- Sleeping in the junkyard...

                  Comment


                  • #69
                    Little sneak peak at my project today. Decided I needed to make a wiring diagram of how this is going to go together, and I have access to Adobe Illustrator, so I took some time and made this

                    Beautiful Beast- 1997 PGT in process of becoming an SC/NA Beast...
                    Elo- 1990 BMW 325i weekend car
                    Brunhilde- 2003 BMW Z4 3.0 6-speed daily driver
                    The Beast- Sleeping in the junkyard...

                    Comment


                    • #70
                      Got another set of LED "fog lights" to use as potential headlights.


                      Honestly neither set is quite right. The single row is a bit too wide, the dual has way too much heat sink on it which makes it much taller than it needs to be. I'm thinking I'll end up cutting into the radiator support to fit the dual row setup.

                      Some of the components to help me rewire the car came in as well:
                      1) Two grounding blocks; one to locate the grounds for all the sensor inputs and run them into pin 7 of the MS, and the other to collect the MS box grounds and run them to a grounding point on the engine block
                      2) MS fuse box
                      3) Car fuse/grounding box


                      Installed


                      Also finished removing the rest of the wiring harness from the engine bay, and the fuse boxes from the engine bay and under the dash. Looks so much better without all that clutter!
                      Beautiful Beast- 1997 PGT in process of becoming an SC/NA Beast...
                      Elo- 1990 BMW 325i weekend car
                      Brunhilde- 2003 BMW Z4 3.0 6-speed daily driver
                      The Beast- Sleeping in the junkyard...

                      Comment


                      • #71
                        Looks great man, definitely one of my favorite ongoing threads right now!

                        Comment


                        • #72
                          Drew up a couple more wiring diagrams just to make sure I understood how everything would be routed and how it would work. First step is to start off with the essentials, basically what it will take to get the car to start and run. As it turns out, that essential piece, is power. I've decided to have 4 basic harnesses; main power/fusing, MS power/fusing, MS input/output, and car accessories.

                          Car main power/fusing:


                          Megasquirt power/fusing:


                          Now I had previously run the power/grounds to have everything working with the stock harness. This was super messy and just not at all fitting with the goal of the project


                          I removed it all and set to work redoing it all. The blank slate I was working with


                          I planned on a second isolator to provide power to the megasquirt fuse box, as can be seen in the wiring diagram. I wanted something more robust than the usual automotive relay, as it would possibly be seeing more than 60amps, and this one was relatively cheap. Decided to install it where the old isolator had been.


                          And relocated the original isolator


                          While the battery box was out, I figured it was a good time to repaint it, and grind clean the top left mounting hole to act as the chassis ground for the negative post.


                          And the battery back in place


                          And everything run...


                          Starter wiring


                          Alternator wiring


                          Inside the car


                          While I was there, I also removed the distributor


                          And put the cap in it's place. This is of course in preparation for going wasted spark.


                          And with a little more time and motivation left, I started on finishing up the cover for the exhaust cutout.


                          As can be seen the welds are quite shitty... it's a huge pain in the ass that some of this metal is SUPER THIN and the new stuff I'm welding in is a bit thicker. You can see pretty clearly how nicely it welds together against itself, but where it welds to the floor it burns through at the drop of a hat!


                          The other side isn't quite as pretty, but it's all going to be ground down anyways


                          Next step will be to finish the cut-out cover, apply sealer to the underside to make sure it doesn't leak at all, wire the MS sensors, and then install the alarm I bought a bit ago.
                          Beautiful Beast- 1997 PGT in process of becoming an SC/NA Beast...
                          Elo- 1990 BMW 325i weekend car
                          Brunhilde- 2003 BMW Z4 3.0 6-speed daily driver
                          The Beast- Sleeping in the junkyard...

                          Comment


                          • #73
                            Clean work with the battery cables, what did you use to crimp your lugs? When I did mine i picked up a cheap the harbor freight hydraulic crimper and it worked fantastic.
                            1992 Probe LX_Rust in Peace
                            1989 Probe GT_Weekend Warrior
                            2002 Focus SVT_Powerworks Supercharged_Gone
                            2014 Fiesta ST_Lemon
                            2017 BRZ Premium_Daily

                            Comment


                            • #74
                              I bought a lug crimper on Amazon that you hammer to crimp. Does the job, although I kind of want something with handles so I can do it on the car. With this one I have to run it on the car as a mock up and then remove all of it and crimp it off the car.

                              I've got to say, of all the work I've done so far, the wiring was by far the most gratifying. Looking at all those new shiny pieces and the overall cleanliness compared to stock... just loving it.
                              Last edited by proboner; January 23, 2017, 10:06 AM.
                              Beautiful Beast- 1997 PGT in process of becoming an SC/NA Beast...
                              Elo- 1990 BMW 325i weekend car
                              Brunhilde- 2003 BMW Z4 3.0 6-speed daily driver
                              The Beast- Sleeping in the junkyard...

                              Comment


                              • #75
                                With the Megasquirt wiring coming up on the agenda, I started off the day by finding a place for the good ol' IAT sensor. When I did this on my last PGT I just drilled a hole in a thick "T" pipe and tapped it. This provided all of like a single thread of contact. This time I decided to go about it a bit more legitly. With the inlet of the CZT IM being where it is, normal PGT CAI's wont work... however, quite luckily and by accident, the half of the PGT CAI below the VAF fits perfectly! What we started with.


                                Drilled a hole once again


                                But this time I went with a bung


                                And learning from my experience with the o2 sensor bung, I went ahead and slotted the bung to fit the curvature of the pipe


                                Lines up pretty well


                                "Finished" product


                                75mm Mustang TB


                                Intake in place


                                and where it ends up


                                With the top side welding of the exhaust cut-out cover finished, I set to work on getting the underside situated.
                                Doesn't look half bad from the bottom


                                Took the exhaust out and put some seam sealer on it to keep thing fumes out of the car. Might I add, removing the exhaust takes all of like 30 seconds, which is nice.


                                And reinstalled everything with the turn down. Even cut out a little tab to hold the wiring up and in place.


                                While I was at it I figured I'd work on the top side of the cover as well, since it was pretty haggard looking. Came out nicely if I do say so myself


                                Got 2 inline fuse holders in the mail as well as 80amp fuses, so I put those in place as well and got the wiring fully situated. Only piece left is to get some coverings


                                After finishing up the exhaust cut-out cover, the thought that I could be ready to put the car back on the ground, came to my mind. However I realized I still needed to make a turn down for the exit of the exhaust, so I decided to remedy that. Started with an old 90* turn...


                                Not the most beautiful thing in the world


                                sanded it a bit smoother and tried to put a little lip into it for ease of welding, and the nut on this thing finally stripped enough to be unusable... what a piece of shit. Probably gonna end up just cutting the tool up to get the turn-down off


                                Also made a few other little adjustments. Worked on getting the throttle cable mounted a bit better. It will eventually be cut up and welded, but for now its a rough draft


                                Cut the plugs off the old harness for the clutch and brake pedals


                                and turned around the TPS sensor on the TB to see if it would work... need to get the MS hooked up to see what the signal looks like.
                                Beautiful Beast- 1997 PGT in process of becoming an SC/NA Beast...
                                Elo- 1990 BMW 325i weekend car
                                Brunhilde- 2003 BMW Z4 3.0 6-speed daily driver
                                The Beast- Sleeping in the junkyard...

                                Comment

                                Working...
                                X